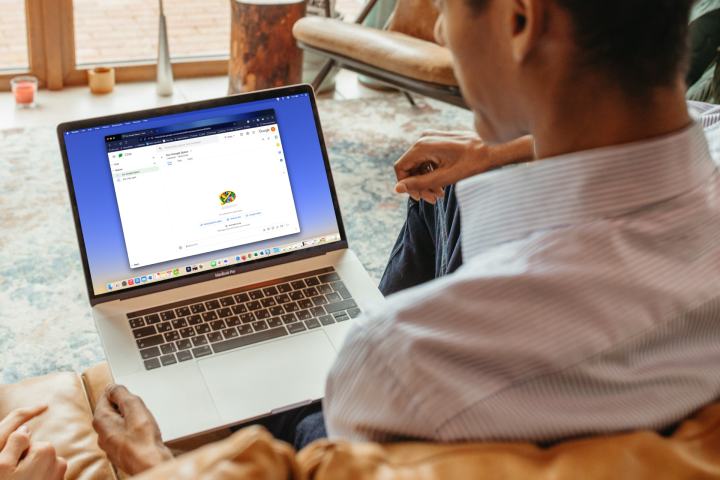
If you’re looking for a free, convenient spot to chat with your team, family, or coworkers, check out Google Spaces. You can access Google Spaces from Google Chat and Gmail, create spaces that are like rooms to communicate, share files and images, and more.
We’ll show you how to use Google Spaces and the features you can take advantage of to work together, plan events, and share items.
Access Google Spaces
Google Chat is the home of Google Spaces, but you can access it conveniently within Gmail, too. Whether on the web or mobile app, this gives you the flexibility to use it wherever is easiest for you.
Step 1: Visit Google Chat and sign in if necessary. You’ll then see Spaces on the left side, which you can expand or collapse as needed.

Step 2: If you want to use Gmail, make sure you have Google Chat enabled in the settings. To do so, visit Gmail and sign in.
Step 3: Select the Gear icon on the top right to open the Settings sidebar. Then, pick See all settings.

Step 4: Go to the Chat and meet tab at the top, and mark the option for Google Chat in the Chat section.

Step 5: Select Save changes at the bottom.
You’ll then see the Spaces section in the left-hand menu that you can open.
Create a space in Google Spaces
You can create a space in Google Spaces in either Google Chat or Gmail in the same way. Your spaces sync so that you can use them in either application as long as you’re signed in with the same Google account. This includes spaces you create and those others set up that you join.
Step 1: Select the Plus sign next to Spaces on the left side or the link for Create or find a space.
Step 2: Choose Create space in the list.

Step 3: Give your space a name and (optionally) a description.
Step 4: You can invite people to your space immediately by adding their names or email addresses. You can also add members later just as easily.

Step 5: If you have a paid Google Workspace account, such as a business account, you can choose whether you’d like to create a restricted space that only those you invite can join, if you want to use threaded replies, and if you want to allow those outside your organization to join.

Step 6: Select Create when you finish.
You’ll see your new space in the Spaces section on the left in Google Chat and Gmail.
Navigate a space
There are a few main tabs at the top of each space that make it simple to navigate. You’ll see Chat, Files, and Tasks.
Step 1: Go to the Chat tab to talk with other members; this is the main area where all conversations take place. Similar to a text message application, you can see each person’s message with their name and icon.
At the bottom is the message field, where you type your message and can use options to format it, add an emoji or GIF, upload a file, or start a video call (using Google Meet).

Step 2: Visit the Files tab to see all uploads. This includes files and images that you can access anytime in your space.

Step 3: Open the Tasks tab to see all tasks in a space. You can add a task with a due date, assign it to someone, and view its location in a conversation. If you are assigned a task, you can visit the Tasks tab to mark it complete.

Manage a space’s members
You can invite others to your space, check on invitations you’ve sent, and remove current members.
Step 1: Open the space using the Spaces section on the left side of Google Chat or Gmail.
Step 2: Select the Arrow next to the space’s name at the top to open the menu.
Step 3: To quickly add new members, select Add people. In the subsequent pop-up window, enter the email addresses, groups, or contact names and choose Invite.

Step 4: To manage the current members, choose View members in the menu.
On the Members tab in the pop-up window, you’ll see all members of the space. Select the Three dots to the right of a member to message, block, or remove them from the space. You can also designate someone as a Space Manager or return them to a member position.

Step 5: On the Invited tab, you can see people you’ve sent invitations to that have yet to join the space.
You can also use the Plus sign in the pop-up window to invite new people to the space.

Manage chats in Google Spaces
You can do things like pin conversations, select the notifications you want to receive, and control the conversation history.
Step 1: Open the space using the Spaces section on the left side of Google Chat or Gmail.
Step 2: Select the Arrow next to the space’s name at the top to open the menu.
Step 3: Choose Mark as read or Mark as unread for a particular message.
Step 4: Pick Pin to pin a message you want to follow up on.
Step 5: Pick Turn off history or Turn on history per your preference. This setting controls if new messages are deleted within 24 hours or not.

Step 6: Select Notifications to adjust the alerts you receive for the space. You can choose to receive notifications for all new messages or only those that mention you. You can also choose to simply see a dot when someone mentions you.

Join a space in Google Spaces
If someone else creates a space and invites you, you can join the space in a couple of clicks.
Step 1: You’ll receive an email notifying you that you’ve been invited to join a space in Google Spaces.
Select the link or button in the email to open Google Chat.

Step 2: You’ll see a pop-up window with the name of the space at the top. You can select the Arrow next to the name and choose View members to see who’s joined the space.
Step 3: Select Join to join the space or Block if you believe it’s spam and want to block it.

Google Spaces is a great spot to chat and share items for both work and personal communications. For more, look at our comparison of Slack versus Microsoft Teams if you’re interested in a business-oriented chat application.


