
Ever see a photograph with a dreamy, out-of-focus background? Or perhaps a landscape with pin-sharp details from the closest foreground elements all the way to distant clouds? Aperture is what allows photographers to take control over how sharp or how blurred their photos are, and is one of three elements that determine a photograph’s exposure. But what is aperture, really?
As part of the exposure triangle, aperture is an essential camera setting, helping determine how bright or dark the image is. Unlike shutter speed and ISO — the other two sides of that triangle — aperture isn’t in the camera, but the lens. The word aperture simply means an opening, and that’s exactly what the aperture of a lens is. By changing the aperture setting, you increase or decrease the size of that opening, letting in less or more light, respectively.
Here’s everything new photographers need to know about using aperture.
What is aperture? The basics
Imagine you are filling a jar with sand. Both jars have the same capacity, but one has a wide opening like a Mason jar and the other has a narrow opening like a soda bottle. If you drop a handful of sand above each jar, which jar is going to collect more sand?
Think of aperture in similar terms. An iris composed of overlapping metal blades inside the lens opens and closes to make the aperture larger or smaller. A larger opening is going to let in more light, making a photo brighter. A smaller opening will let in less light and make the photo darker.
Apertures are measured in f-numbers, or f-stops, which is where the concept can start to get a bit more confusing. A small f-number, like f/2.8, is a wide aperture. A larger f-number, like f/16, is a narrow aperture. Just remember that f-numbers are opposite of what you’d expect: a low number means wide, and a higher means narrow. (F-numbers are actually the denominator of a fraction, so the math isn’t as backwards as it seems.)
Of course, there are more aperture settings than just f/2.8 and f/16. Some lenses may open as wide as f/1.4, or stop down to f/22 and beyond. As with shutter speed and ISO, aperture controls exposure in the unit of “stops.” Increase the size of the aperture by 1 stop, and you’ve doubled the amount of light coming through the lens. Decrease it by a stop, and you’ve cut the amount of light in half. Modern cameras allow you to make adjustments in 1/3-stop increments (oh no, more fractions!) so that you have fine control over the exposure.
Here are some common f-numbers arranged in full-stop increments: f/1.4, f/2, f/2.8, f/4, f/5.6, f/8, f/11, f/16. This shows that f/2.8 is half as bright as f/2, which itself is half as bright as f/1.4. That means f/2.8 is four times darker than f/1.4, although all you really need to know is the number of stops: If you open the aperture by 2 stops, you’ll need to change the shutter speed or ISO by two stops to compensate.
How do you change the aperture on your camera?
While you need to also understand ISO and shutter speed in order to control exposure in manual mode, you can dip your toes in slowly by starting with aperture priority mode. This mode, designated on most camera mode dials as A or Av, allows you to control just the aperture, while the shutter speed and ISO can remain on auto. (It is possible to take the ISO off auto if you want). Aperture priority mode is an easy way to learn how aperture affects images — once you understand aperture priority (and its counterpart, shutter speed priority), manual mode won’t seem so daunting.

On some cameras or lenses, the aperture is adjusted via a dedicated ring around the lens, but most modern cameras put aperture control on the camera body itself, usually in the form of a command dial. As you turn that dial, you should be able to see the f-numbers changing in the viewfinder or on the LCD screen. The range of available numbers will vary based on the lens model, so if you reach a point where the camera won’t change the aperture any more, you’ve reached the beginning or end of that range.
Aperture priority mode is a semi-automatic — your camera is still choosing the best exposure for the image by controlling shutter speed (and, optionally, ISO). That means in aperture priority mode, you probably won’t see your image getting brighter or darker as you change the f-number.
But wait, why use aperture priority mode at all if the camera is still making the exposure decisions for you? Aperture controls more than just the exposure of the image — it also adjusts depth of field.
Aperture and depth of field
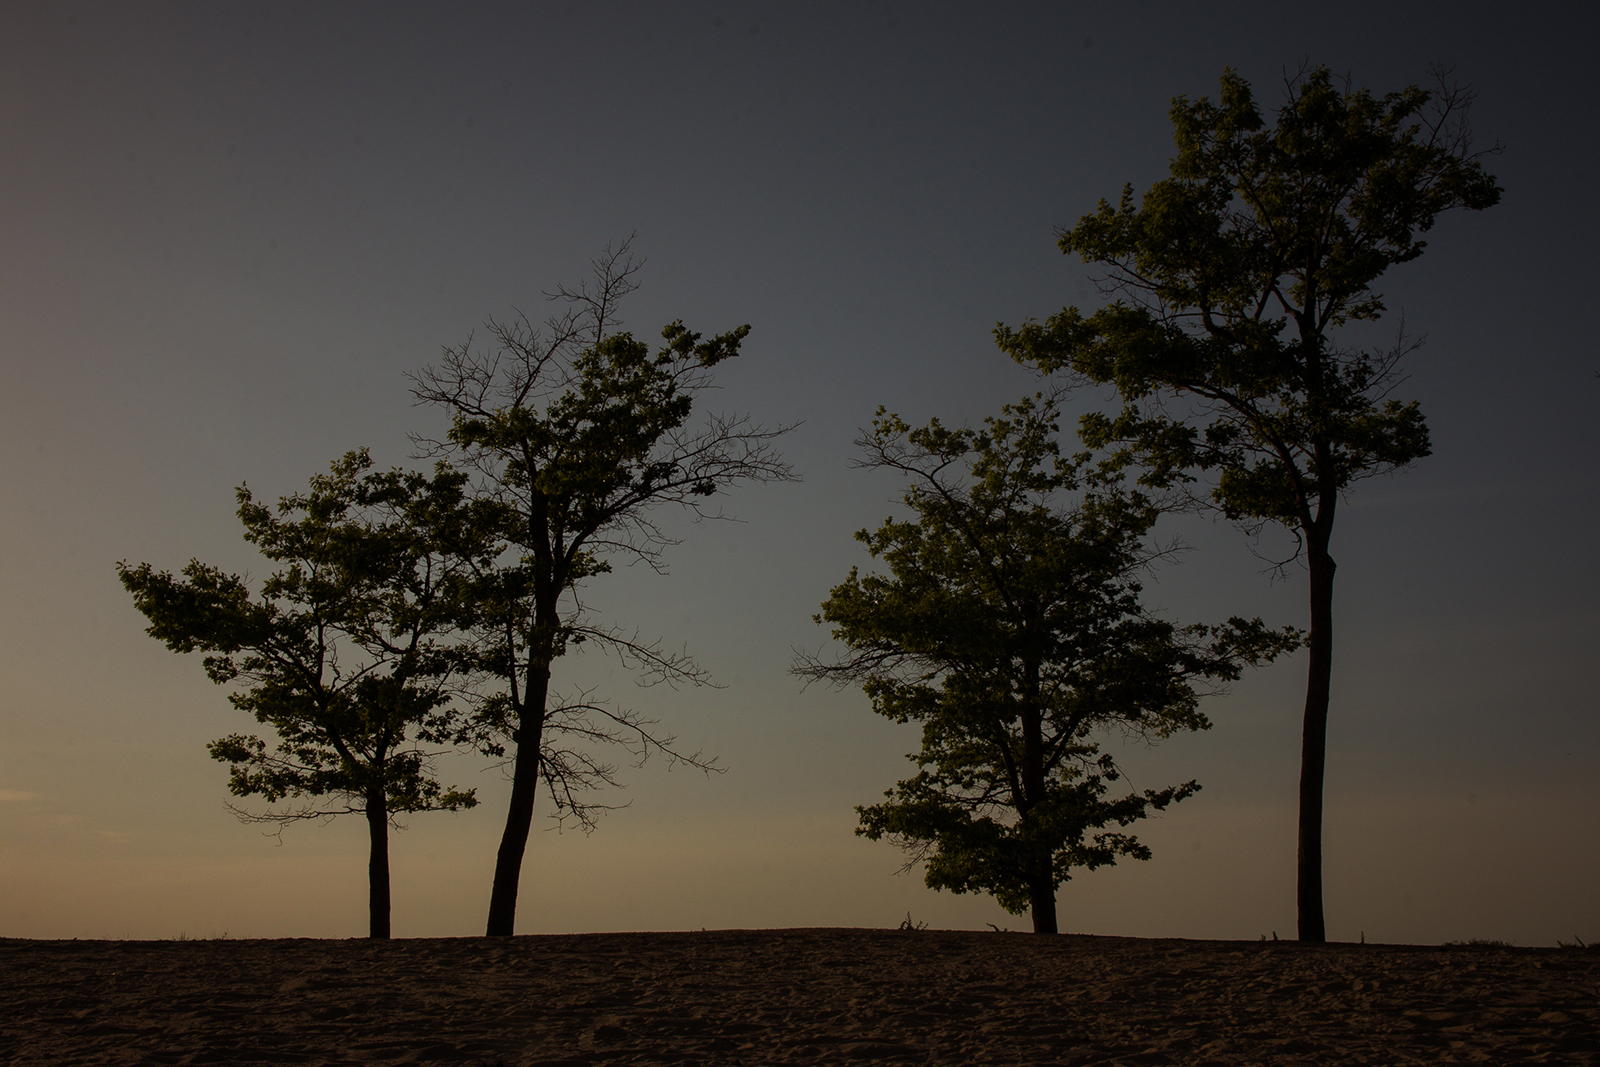
Depth of field is a photography term that simply refers to how much of the image is in focus, from foreground to background. You’ve probably seen portraits with very blurred backgrounds and you’ve probably seen landscapes where most of the image is sharp. The difference between the two is aperture.
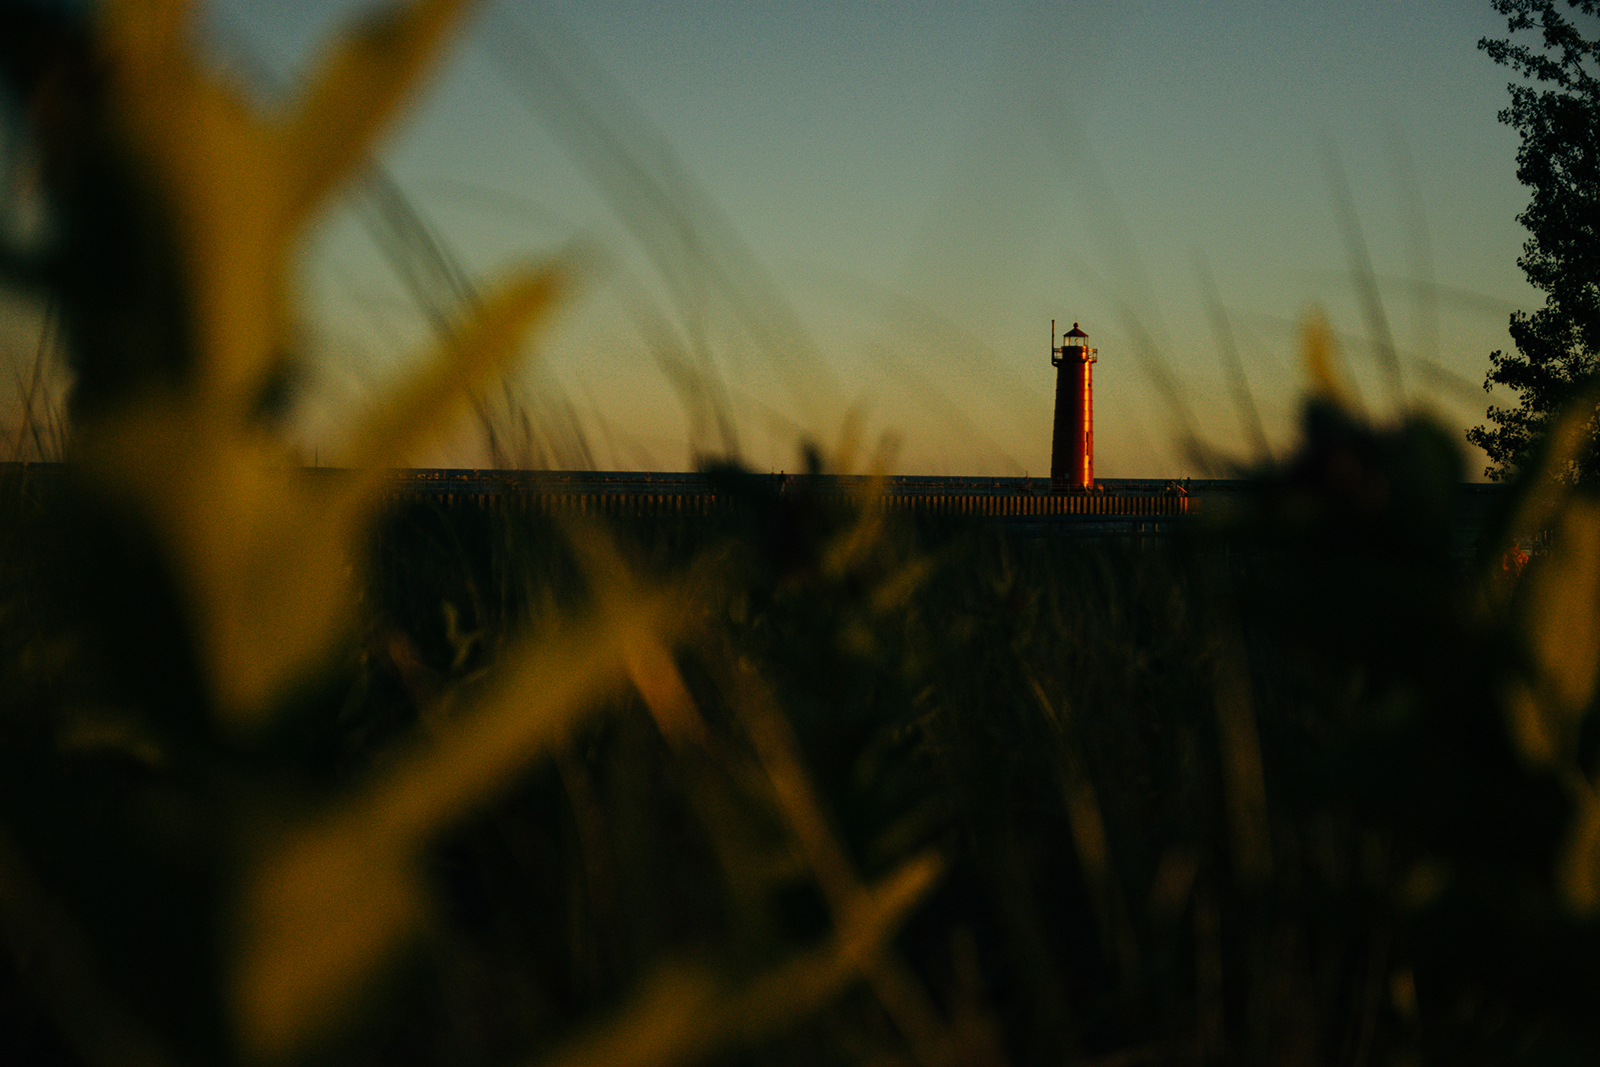
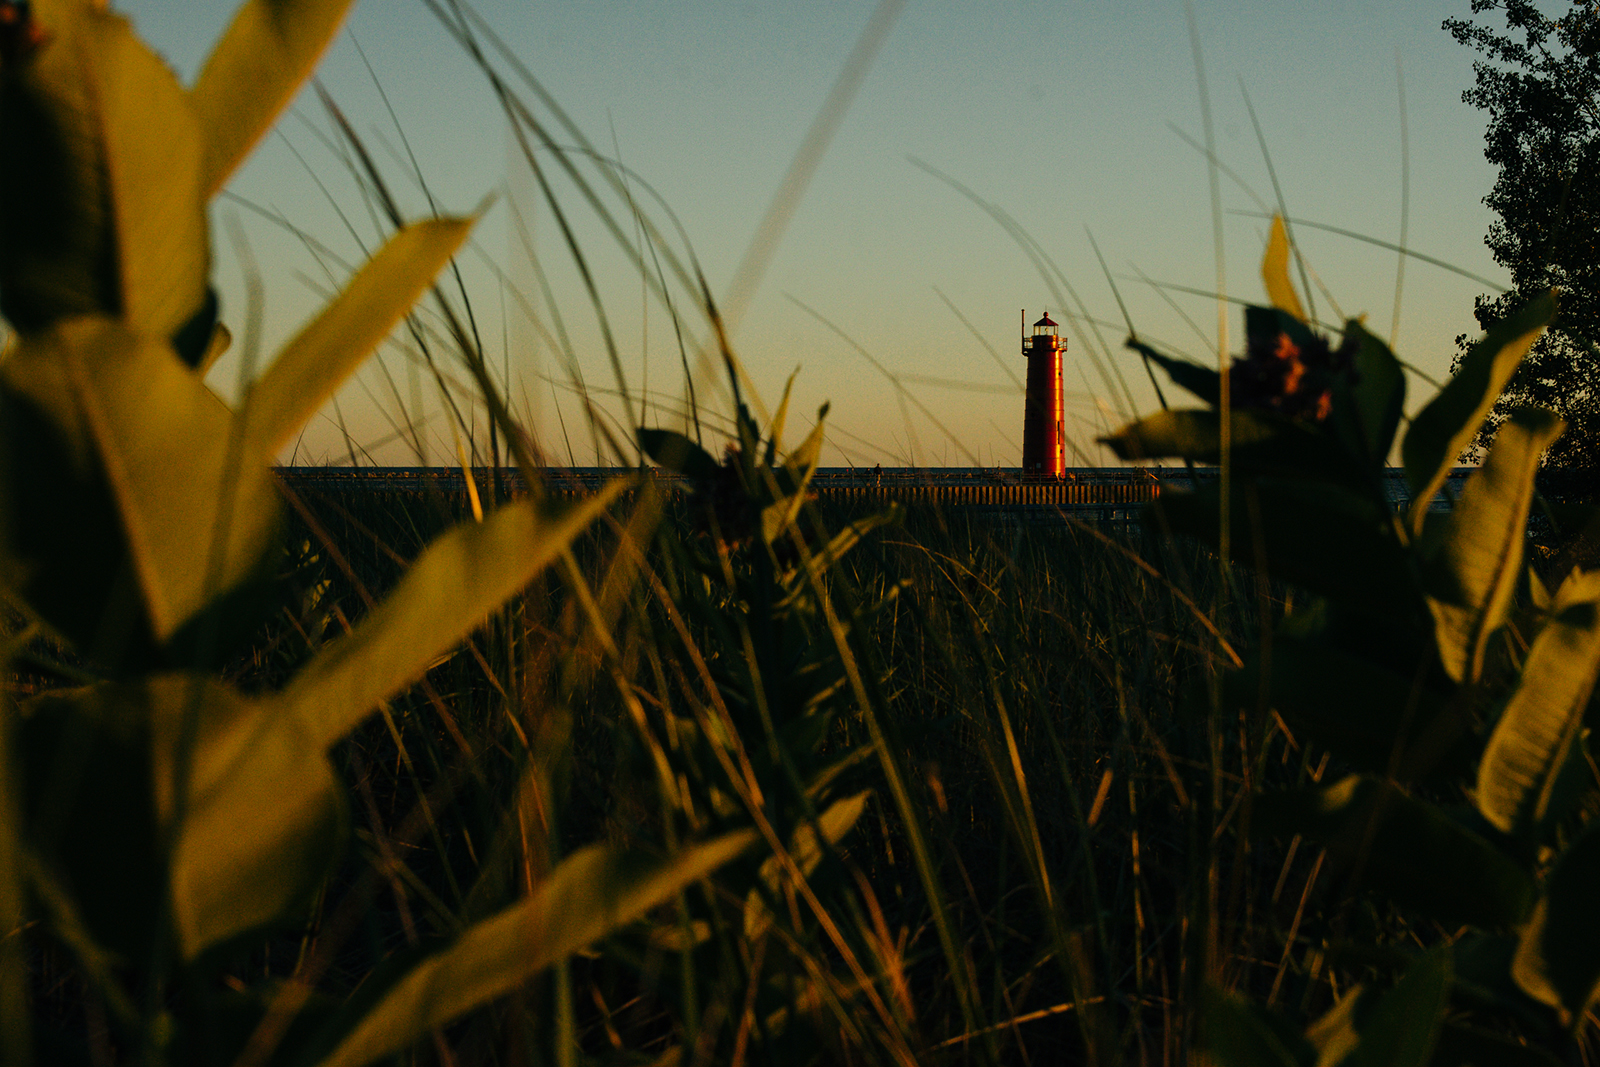
A wide aperture, small f-number, means only a small portion of the image is in focus, in what is called a shallow depth of field. At f/1.8, for example, the subject’s eyes may be in focus, but their nose will be soft. With the widest apertures, objects even an eighth of an inch from the subject can be out of focus. Wide apertures are great for blurring out distractions in the background, drawing more attention to the subject, and creating those out-of-focus points of light called bokeh.
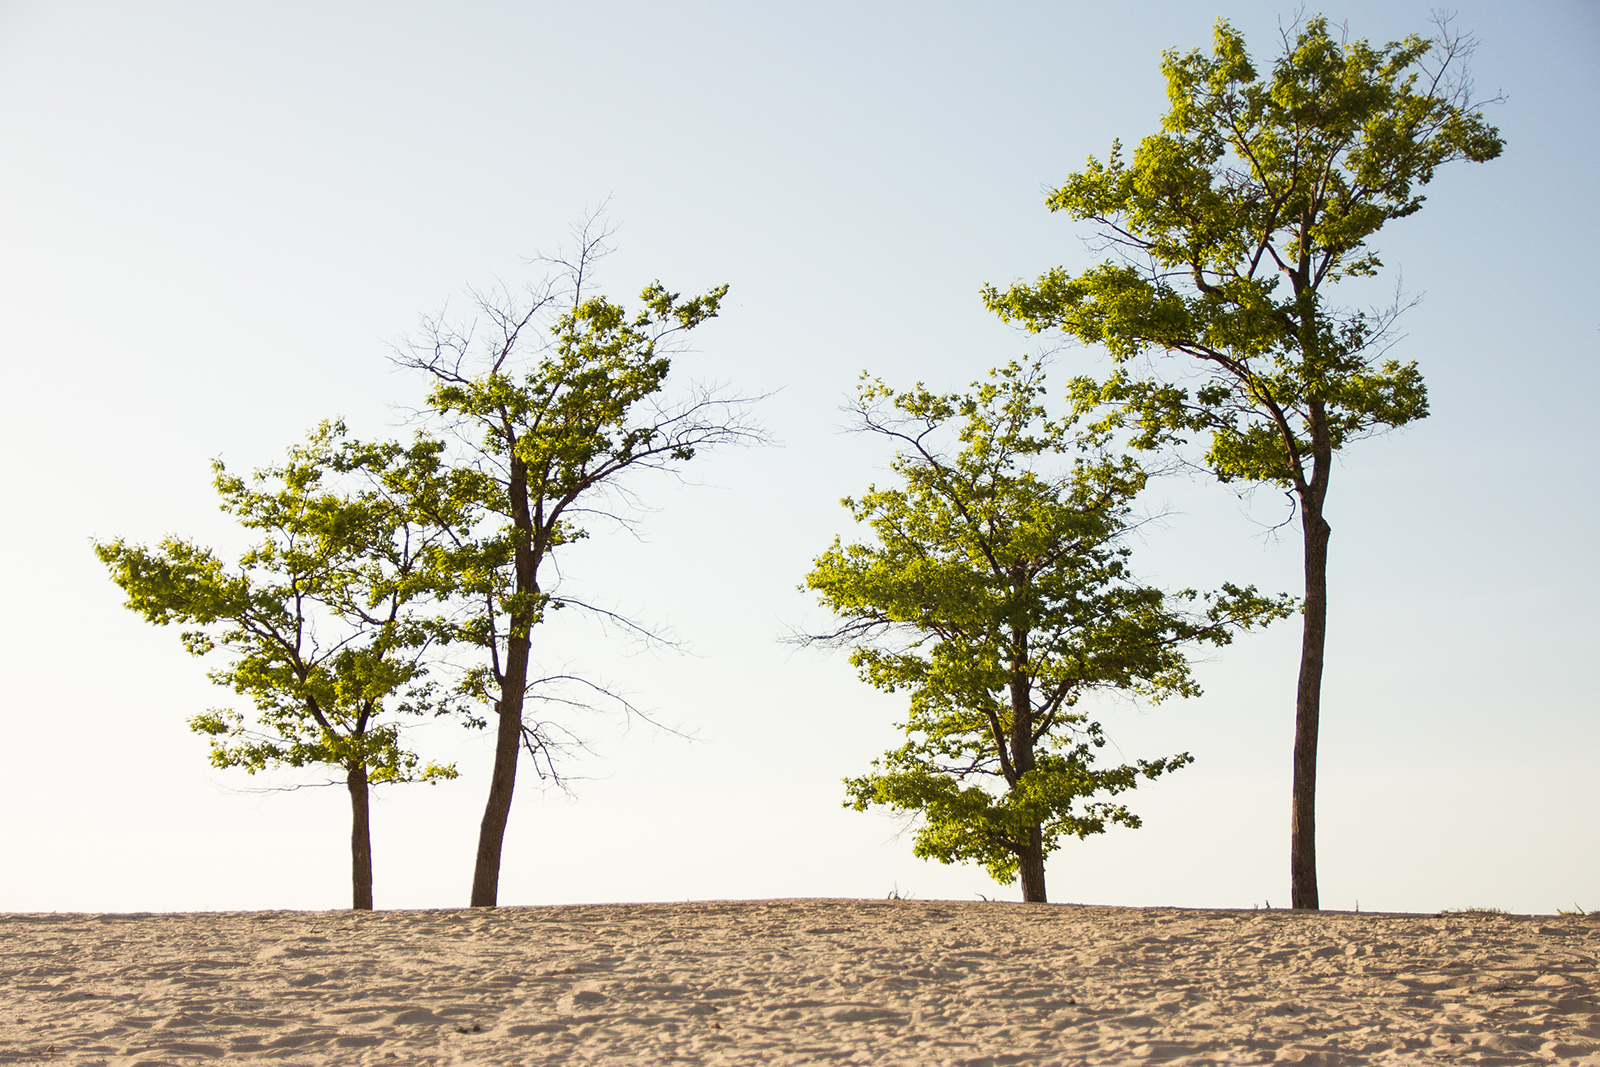
A narrow aperture, large f-number, leaves more of the details intact and creates a deep depth of field. If you want to see all the details in that impressive scene in front of you, you want to use a narrower aperture like f/11 or f/16.
Depth of field works both ways — you can use a wide aperture to blur the foreground just like you can the background. This can let you “shoot through” things like chain link fences, foliage, or reflective glass to reveal the subject in the background.
As you learn aperture and depth of field, be careful not to fall into some of the most common pitfalls for beginners. Photographers that love that soft background sometimes use the widest available setting and just leave their cameras there. The problem is that the depth of field is so narrow, the whole subject may not be sharp. This is particularly important to pay attention to when taking group photos — if the subjects aren’t the same exact distance from the camera and you shoot at f/1.8, not everyone will be in focus.

Photographers should also note that the narrower an aperture gets, the more likely any point lights, like the sun, will create starbursts. That can be a good or bad thing depending on the look you are going for. If you want the sun to starburst through some trees, try using a narrower aperture. If you don’t care for the starburst, open up the aperture a bit.
Once you understand aperture, shutter speed, and ISO, you can capture well-exposed images in almost any lighting conditions. But learning what aperture does beyond just exposure is what allows you to make informed, creative decisions about the look of your photographs.
Editors' Recommendations
- Photography 101: Exposure, aperture, shutter speed, and ISO
- What is aperture priority? Unlock your camera’s potential with this mode


